Catalog
Equipment
2222 products
View:
- Selected: 0Areas of use
- Selected: 0Item names
- Selected: 0Manufacturer
- Selected: 0Made in
- Selected: 0Additional
View:
2222 products
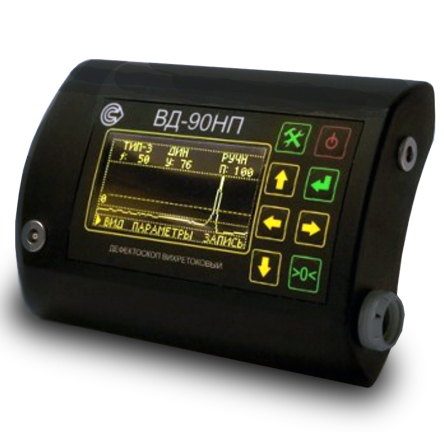
VD-90NP Eddy current flaw detector in the basic configuration
from
398 250 ₽
The principle of operation of the device:
The principle of operation of the flaw detector is based on the excitation of eddy currents in the controlled product and the subsequent release of a signal at the output of the converter, the amplitude and phase of which are determined by the secondary field of eddy currents.
Design features and advantages of the VD-90NP flaw detector.
The device has a small-sized case, which ensures its lightness, ergonomics and allows you to mount it on your belt or on your arm. The measurement is performed using a remote converter connected by a flexible cable. There are several types of converters for eddy current flaw detection of products made of different materials and different geometries. The large and bright display displays the selected operating modes and measurement results in text and graphic form. The VD-90NP is also characterized by:
high sensitivity (it detects cracks starting from 0.1 mm in size);
dust–and-moisture-proof housing, which makes it applicable for work in the field;
large operating frequency range;
maximum working clearance up to 10mm;
Bluetooth connection;
the ability to control products with high surface roughness, up to Rz320 class;
light and sound indication of defect detection;
wide operating temperature range from –30°C to +50°C;
autonomous low-voltage power supply;
long continuous operation time from one set of batteries;
compliance with the standard GOST R ISO 15549-2009 (ISO 15549:2008).
The use of a microprocessor-based hardware and software platform provide it with the following operational characteristics:
automatic adjustment when measuring conditions change, including compensating the influence of the gap;
built-in calibration modes;
saving the measurement results in the internal memory of the device;
a large number of stored programs: sets of parameters and measurement modes, both preset and saved by the user so as to repeatedly monitor the same type of products;
The Bluetooth 2.0 wireless communication module allows the device to be used in conjunction with an external laptop or mobile device for remote control, transmission of measurement results for further storage, printing, documentation and analysis.
Scope of application:
The eddy current method is suitable for non-destructive testing and detection of microcracks in products and parts made of any metals and alloys of complex shape, with high surface roughness, through non-conductive coatings, as well as for checking welded joints. The flaw detector can be used to control parts and assemblies of aviation equipment.
The VD-90NP eddy current flaw detector is used for quality control and preventive examination of:
- components and parts of rolling stock at railway transport enterprises: wheel sets, auto coupler housings, side frames, spring beams, labyrinth rings, pulleys;
- pipes, profiles, rods at rolling mills at the output control, and at the input control of consumers of products;
- products made of aluminum and titanium alloys with multilayer coatings at enterprises of the aviation and aerospace industry;
- cables, beams, critical components of equipment (cranes, lifts) in construction;
- main pipelines in order to detect stress corrosion.
A wide range of operating temperatures, dust and moisture protection (IP54 degree of protection), autonomous low-voltage power supply, a long time of continuous operation of the device allows it to be used in the field at low temperatures and under precipitation (rain, snow).
Basic kit:
• 1 electronic unit for the VD-90NP eddy current flaw detector;
• 1 Ia5.125.052 (Type-2) eddy current converter;
• 1 converter cable;
• 1 charger with batteries;
• 1 hand strap;
• 1 Ia8.896.104 sample with artificial defects;
• 1 Ia8.896.035 coating sample;
• 1 storage and carrying case;
• 1 documentation set.
RII MNPO SPEKTR
Moscow
Produced in: Moscow
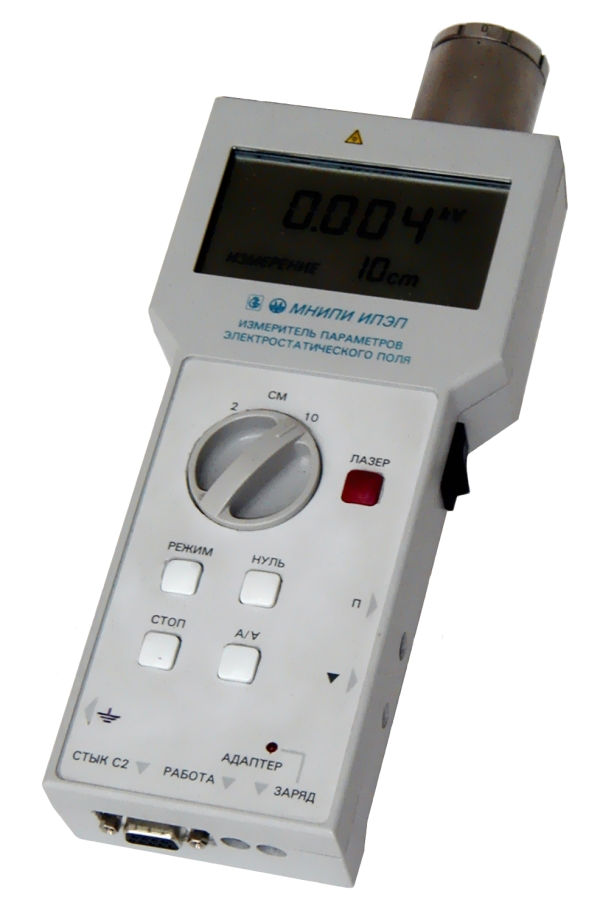
IPEP-1 Electrostatic Field Parameter Meter
Designed to measure the potentials of electrostatically charged objects, the strength of the electrostatic field and the surface density of electric charges.
Technical specifications:
Measuring range 0.02-50 kV
The error is 5-10%
The intensity of the electrostatic field
Measuring range 2-1000 kV/m
Error 5%
Surface density of electric charges
Measuring range 0.02-10 µcl/m2
Error 5%
Measurement of the electrostatic field strength (2-1000 kV/m)
Measurement of the potential of charged objects (0.02–50 kV)
Measurement of surface charge density (2x10⁻⁸–1x10⁻⁵Kl/m2)
Measurement error ±(5-10) %
Laser pointer of the distance to the object (2, 10 cm)
3.5-digit indicator (LCD with image flip)
RS-232C interface
Dimensions, weight 40x106x268 mm, 0.7 kg
Built-in battery for 8 hours of operation
Power supply: ~220, 5 VA, 4.5–5.5 VA battery
MNIPI
Minsk
Produced in: Belarus, Minsk
Smart air probe L=150 mm SSV.150P with built-in flash memory
from
12 351 ₽
Designed to measure the temperature of various materials by direct contact of the probe with the measuring object
The smart air probe L=150 mm SSV.150P with built-in flash memory is designed to measure the temperature of various media by direct contact of the probe with the measuring object and transmitting the measured value via Bluetooth to devices with the ThermoMonitor. Android program is installed.
Operating conditions of the SZV.150P smart probe
Ambient temperature, °C: -20...+55.
Relative humidity, %: not more than 80 at T=35 °C.
Atmospheric pressure, kPa: 86...106.
Functionality of the smart probe SSV.150P
Measurement of physical quantities with a resolution of 0.01.
Recording of measured values at intervals from 5 seconds to 23 hours 59 minutes 59 seconds (only smart probes with built-in memory).
Transmitting data about measured physical quantities via Bluetooth to a device with the ThermoMonitor, Android program installed.
Transmitting information about the state of charge of the built-in battery via Bluetooth to a device with the ThermoMonitor, Android program installed.
Automatic transition to sleep mode after 50 seconds.
The ability to connect an external power supply.
Possibility of calibration.
TEKHNO-AS
Kolomna
Produced in: Kolomna, Moscow region
Smart probe of relative humidity and temperature L=1000 mm SSVL.1000
from
16 560 ₽
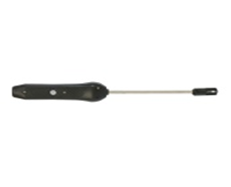
The smart probe of relative humidity and temperature L=1000 mm SSVL.1000 is designed to measure the temperature of gaseous materials without mechanical impurities and aggressive vapors, relative humidity by direct contact of the probe with the measuring object and transmitting the measured value via Bluetooth to devices with the installed ThermoMonitor based on the Android program.
Operating conditions of the SZVL.1000 smart probe
Ambient temperature, °C: -20...+55.
Relative humidity, %: not more than 80 at T=35 °C.
Atmospheric pressure, kPa: 86...106.
Functionality of the smart probe SSVL.1000
Measurement of physical quantities with a resolution of 0.01.
Recording of measured values at intervals from 5 seconds to 23 hours 59 minutes 59 seconds (only smart probes with built-in memory).
Transmitting data about measured physical quantities via Bluetooth to a device with the ThermoMonitor based on the Android program.
Transmitting information about the state of charge of the built-in battery via Bluetooth to a device with the ThermoMonitor based on the Android program.
Automatic transition to sleep mode after 50 seconds.
The ability to connect external power.
Possibility of calibration.
TEKHNO-AS
Kolomna
Produced in: Kolomna, Moscow region
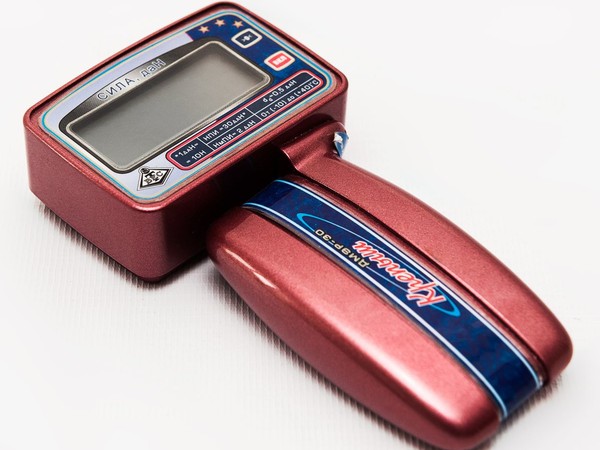
DMER-30-0,5 medical electronic manual dynamometer
from
7 600 ₽
TVES
Tulinovka
Produced in: Tambov Region, Tulinovka

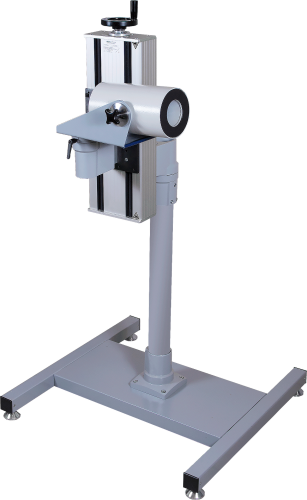
HUMAN RADIATION SPECTROMETERS SKG‑AT1322, SKG‑AT1322/1
Flexible software control of the spectrometer functions, the formation of a database and a report on the results of the survey
Express control capacity - 15 people per hour
The possibility of sharing AT1316(AT1316A) and AT1322(AT1322/1)
The possibility of accommodation in a minibus as part of a mobile radiation control laboratory
Atomtekh
Minsk
Produced in: Belarus, Minsk
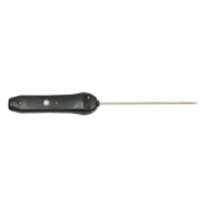
Smart submersible reinforced probe L = 150 mm SZPGU.150P with built-in flash memory
from
12 144 ₽
Smart submersible reinforced probe L = 150 mm SZPGU.150P with built-in flash memory is designed to measure the temperature of various materials by direct contact of the probe with the measuring object and transmitting the measured value via Bluetooth to devices with the ThermoMonitor, Android program installed.
Operating conditions of the SZPGU.150P smart probe
Ambient temperature, °C: -20...+55.
Relative humidity, %: not more than 80 at T=35 °C.
Atmospheric pressure, kPa: 86...106.
Functionality of the SZPGU.150P smart probe
Measurement of physical quantities with a resolution of 0.01.
Recording of measured values at intervals from 5 seconds to 23 hours 59 minutes 59 seconds (only smart probes with built-in memory).
Transmitting data about measured physical quantities via Bluetooth to a device with the ThermoMonitor, Android program installed.
Transmitting information about the state of charge of the built-in battery via Bluetooth to a device with the ThermoMonitor, Android program installed.
Automatic transition to sleep mode after 50 seconds.
The ability to connect an external power supply.
Possibility of calibration.
TEKHNO-AS
Kolomna
Produced in: Kolomna, Moscow region
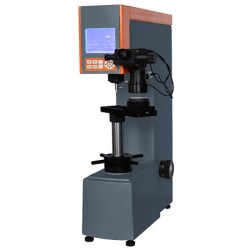
Metolab 702 Universal Hardness Tester
The universal METOLAB 702 device is a stationary hardness tester, a modification of METOLAB 701, equipped with a large LCD display, a built–in printer, and also having the functionality for statistical processing of measurement results (calculation of minimum/average/ maximum values, conversion of results into various scales, storing data in memory, etc.). The device is designed to determine hardness by scales Rockwell, Vickers and Brinell of various materials and products – steels, cast iron, non-ferrous metals, soft alloys, etc. The METOLAB hardness tester has high accuracy, performs measurements in a wide range, and also provides high repeatability of results.
Distinctive features of the stationary METOLAB 702 hardness tester:
Scales for Rockwell measurements: HRA, HRB, HRC;
Scales for Brinell measurements: HBW2.5/31.25, HBW2.5/62.5, HBW5/62.5, HBW2.5/187.5, HBW 10/100, HBW 1/30;
Vickers measuring scales: HV30, HV100;
Displaying all the necessary information on a large LCD screen;
Possibility of statistical processing of measurement results – calculation of minimum/average/maximum values, conversion of results into various scales, storing data in memory and much more;
Electromechanical drive for application and removal of load;
Prompt change of the applied load by turning the force change knob;
The ability to print the results on the built-in mini printer;
Built-in digital micrometer with backlight, magnification 37.5 and 75x.
Basic delivery package:
Stationary universal METOLAB 702;
Conical diamond Rockwell indenter (120° angle) - 1 pc.;
Vickers diamond indenter (136° angle) - 1 pc.;
Indenter with 1.5875 mm ball - 1 pc.;
Indenter with 2.5mm ball - 1 pc.;
Indenter with 5.0 mm ball - 1 pc.;
Large flat table 150 mm - 1 pc.;
Medium flat table 60 mm - 1 pc.;
V-shaped table 40 mm - 1 pc.;
Hardness measures - 1 set;
15x microscope - 1 pc.;
2.5x lens - 1 pc.;
5.0x lens - 1 pc.;
User Manual.
Metolab
Moscow
Produced in: Moscow
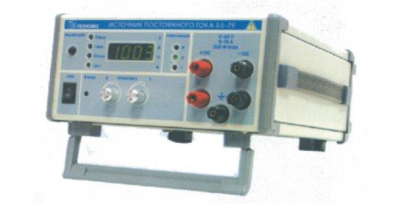
DC power supply B5-79
The B5-79 DC power supply is designed to provide constant voltage and current to measuring instruments and equipment during the development, production, operation and repair of electronic devices.
Technical specifications
Output voltage setting range from 0 to 60 V
Output current setting range from 0.2 to 10 A
Maximum output power 300W
The main error of the output voltage setting is ± 300 mV
The main error of the output current setting is ± 100 mA
Additional error in setting the output voltage caused by a deviation of the mains voltage from the nominal value by ± 10% ± (0.0001 · Uust + 1 mV)
Additional error in setting the output voltage caused by a change in the load current from 0.9 of the maximum value to zero ± (0.0002 · Uust + 5 mV)
Additional error in setting the output current caused by a deviation of the mains voltage from the nominal value by ± 10% ± (0.0002 · Iust + 2 mA)
Additional error in setting the output current caused by a change in the load voltage from 0.9 of the maximum value to zero ± (0.0005 · Iust + 5 mA)
Instability of the output voltage for any 10 minutes during 8 hours of continuous operation, no more than ± 50 mV
Instability of the output current for any 10 minutes during 8 hours of continuous operation, no more than ± 50 mA
Operating temperature range from minus 10 to 50 °C
AC power supply 220 V, 50 Hz
Power consumption, no more than 500 VA
Overall dimensions, mm 240x128x313
Weight, not more than 6.0 kg
TEKHNOYAKS
Moscow
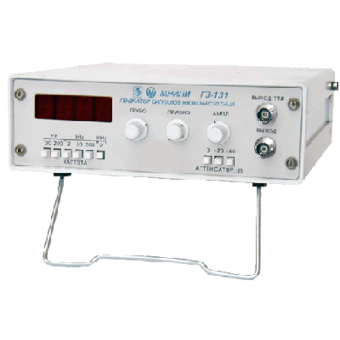
Generator G3-131
Technical specifications:
Frequency range, from 2 Hz to 2 MHz
Frequency setting error, ± 1 %
Signal amplitude:
- at a load of 600 ohms
, at least 5 V at
least 10 V
Smooth signal attenuation, at least 20 dB
Frequency instability:
- in 15 minutes
- for 180 minutes, no more than 0.1%
no more than 0.5 %
Harmonic coefficient:
- in the frequency range from 10 Hz to 20 Hz
- in the frequency range sv. 20 Hz to 200 kHz
- in the frequency range of 200 kHz to 2 MHz, not more than 0.5%
not more than 0.2%
not more than 1 %
MNIPI
Minsk
Produced in: Belarus, Minsk
