Catalog
Search
471 products
View:
- Selected: 0Areas of use
- Selected: 0Item names
- Selected: 0Manufacturer
- Selected: 1Made in
- Selected: 0Additional
View:
471 products
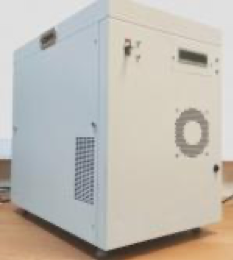
Nitrogen Generator GA-400-K
The nitrogen generator is designed to create an inert atmosphere, fill low-pressure tanks, "wash" test tubes with inert gas and other applications that require a large, by laboratory standards, nitrogen consumption with reduced requirements for its purity. The warranty for the device is 18 months, for the built–in compressor - 12 months from the date of sale.
Technical specifications
Volume fraction of nitrogen is not less than 99.5 % vol. (including impurities of inert gases — argon, neon, helium)
Volume fraction of oxygen is not more than 0.5% vol. (ppm)
Volume fraction of water vapor is not more than 0.002 % vol. (ppm) (20 ppm)
Maximum nitrogen capacity is not less than 400 l/hour (6.66 l/min)
Nitrogen outlet pressure is 4±0.2 ati
The time of setting the operating mode for single-shift operation is no more than 45 min
Noise level generated by the compressor is no more than 60 db
Power consumption is not more than 800 VA
Overall dimensions, (width x depth x height) are not more than 360x680x550 mm
Weight is not more than 46 kg
Operating conditions:
ambient air temperature, oS from +10 to +35
electric power supply from single-phase AC voltage, 220 ± 5%
frequency, Hz 50 ± 1
Average full service life is at least 6 years
The generator for electrical safety meets the requirements of GOST 12.2.025-76. class 1, type
NPP Himelektronika
Moscow
Produced in: Moscow
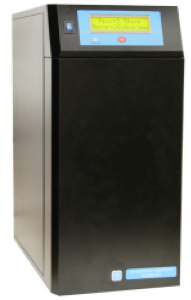
Pure Air Generator GCHV-2.0-3.5
from
200 400 ₽
The generators are designed to supply analytically clean air to flame ionization detectors and gas analyzers. They are available in two versions depending on performance and output pressure. Thanks to the presence of a system of catalytic purification of air from hydrocarbons, the generator can significantly improve the accuracy and sensitivity of chromatographic analyses.
Technical specifications
Air capacity reduced to normal conditions is not less than 2.0 l/min
Outlet air pressure is 355 ± 5% kPa (3.5 ati)
Output pressure stability at constant flow rate is not worse than ± 10 kPa
The stability of the output pressure when the flow rate changes from 0.3 to the maximum value is not worse than ± 10 kPa
Output concentration of hydrocarbons is not more than 0.1 ppm
Water vapor concentration at 20°C and 100 kPa is no more than 10 ppm
Ready time after switching on is no more than 30 min
Power consumption is not more than 200 VA
Overall dimensions of the generator (width x depth x height) are not more than 230x425x510 mm
The mass of the generator is not more than 18 kg
Working conditions:
ambient temperature, °C from +10 to +35
relative humidity of the ambient air, % 80
power supply from a single-phase network:
AC voltage, 220 ± 10%
and frequency, Hz 50 ± 1
NPP Himelektronika
Moscow
Produced in: Moscow
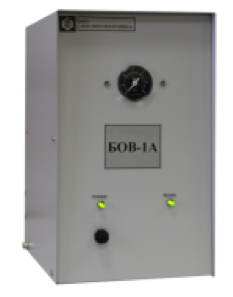
Nitrogen Purification Units BOV-1A
from
69 600 ₽
They are designed for purification of nitrogen (BOV-1A) and air (BOV-1) from hydrocarbons
Technical specifications
Maximum nitrogen inlet pressure is not more than 410± 5% kPa (4 ati)
Maximum allowable nitrogen consumption is no more than 350 ml/min
The concentration of hydrocarbons in terms of methane in the input nitrogen is not more than 0.0025 %(25 ppm)
The concentration of hydrocarbons in nitrogen at the outlet of the device at maximum flow is not more than about 0.00001 % (0.1 ppm)
Ready time after switching on at a flow rate not exceeding the maximum value is no more than 30 minutes
Power consumption is not more than 50 VA
Overall dimensions, (width x depth x height) are not more than 185x310x310 mm
Weight is not more than 5.0 kg
Working conditions:
ambient temperature, °C, from +10 to +35
relative humidity of the surrounding air, %, no more, at 35 °C 80
Electric power supply from a single-phase AC network
with a voltage of 220 +10% -15%
and a frequency of 50 ± 1 Hz
NPP Himelektronika
Moscow
Produced in: Moscow
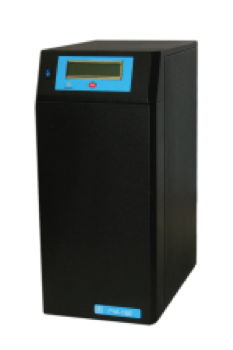
Pure Nitrogen Generator GCHA-15D-K
from
352 800 ₽
The characteristics of the device are similar to the GCHA-18D-K model.
The difference is the generator capacity of 15 liters /hour.
An oil-free compressor is also built into the generator, which ensures complete autonomy of the device.
The warranty for the device is 18 months, for the built–in compressor - 12 months from the date of sale.
Technical specifications
The grade of nitrogen produced according to GOST 9293-74 is high purity, grade I
Volume fraction of nitrogen is not less than, % vol.
(including impurities of inert gases: argon, neon, helium) 99,999
Volume fraction of oxygen is not more than, % vol. (ppm) 0.0005 (5 ppm)
Volume fraction of water vapor is not more than, % vol. (ppm) 0.0007 (7 ppm)
Volume fraction of hydrogen is not more than, % vol. (ppm) 0.0002 (2 ppm)
Volume fraction of the sum of carbon-containing compounds in terms of methane is not more than, % vol. (ppm)
(with a concentration of methane in the supply air not more than 5 ppm)* 0.00001 (0.1 ppm)
Maximum nitrogen capacity is not less than 15 liters/hour (250 ml/min)
Nominal output pressure of nitrogen is 4 ati
The time of setting the operating mode for single-shift operation is no more than 45 min
Noise level generated by the compressor is no more than 45 dB
Power consumption is not more than 200 VA
Overall dimensions, (width x depth x height) are not more than, mm 230x470x510
Weight is not more than, kg 23
Working conditions:
Ambient temperature, °C from +10 to +35
Electric power supply from a single-phase AC network with a voltage of 220 ± 10%
and a frequency of 50 ± 1 Hz
Average full service life is at least 6 years
The generator for electrical safety meets the requirements of Class 1, type H according to GOST 12.2.025-76
NPP Himelektronika
Moscow
Produced in: Moscow
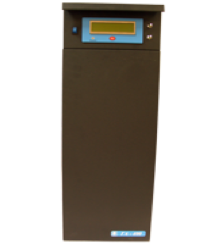
Pure nitrogen generator GCHA-180
from
448 800 ₽
GCHA-180 nitrogen generators are designed to produce in laboratory conditions nitrogen of the highest purity that is used to power analytical instruments, boxes with an inert atmosphere.
Technical specifications
The grade of nitrogen produced according to GOST 9293-74 is high purity, grade I
Volume fraction of nitrogen is not less than, % by volume (including impurities of inert gases — argon, neon, helium) 99.999
Volume fraction of oxygen is not more than, % vol. 0.0005 (5 ppm)
Volume fraction of water vapor is not more than, % vol. 0.0007 (7 ppm)
Volume fraction of hydrogen is not more than, % vol. (ppm) 0.0002 (2 ppm)
The volume fraction of the sum of carbon-containing compounds in terms of methane is not more than, % vol. (ppm)*
(with a methane content in the supply air of not more than 4 ppm) 0.0003 (3 ppm)
Maximum nitrogen capacity is not less than, l/h, 180 (3.0 l/min)
Nominal nitrogen output pressure (with the throttle open) is 4 ati
The time of setting the operating mode for single-shift operation is no more than 45 min
Nominal inlet air pressure is 6 ati
Maximum allowable inlet air pressure is 8 ati
Minimum inlet air pressure is 5.5 ati
Compressed air consumption, at nominal inlet pressure and maximum flow rate is no more than, l/h, 4200 (60 l/min)
Power consumption is not more than, VA, 100
Overall dimensions, (width x depth x height) are not more than, mm, 230x580x680;
Weight is not more than, kg 36
Working conditions:
ambient temperature, C°, from +10 to +35
Electric power supply from
single-phase AC mains voltage, V, 220± 10%
and frequency, Hz, 50 ± 1
Average full service life is at least 6 years
The generator for electrical safety meets the requirements of Class 1, type H according to GOST 12.2.025-76
NPP Himelektronika
Moscow
Produced in: Moscow
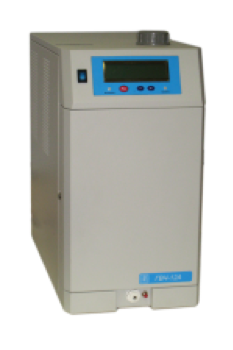
Pure Hydrogen Generator GVCH-36A
from
447 600 ₽
The characteristics of the device are similar to the model GVCH-12A (GVCH-25A).
The difference is the generator capacity of 36 liters / hour, the purity of the produced hydrogen is lower (99.998% vol).
Technical specifications
Purity of hydrogen in terms of dry gas is about 99.998 %
Concentration of water vapor at 20OC and 3 atm is no more than 7 ppm
Total hydrogen capacity reduced to normal conditions is 36 l/h
The range of the specified output pressure of hydrogen is from 3.0 to 6.1 ati
Stability of the output pressure of hydrogen is not worse than ± 0.03 ati
The time of setting the operating mode, with the output turned off is no more than 30 min
Volume of distilled water to be poured is 1.0 l
Distilled water consumption is no more 0.06 l/hour
Water consumption is 1.6 g/l of hydrogen
The average life of a replaceable deionization filter cartridge (at maximum performance and single-shift operation) is at least 0.5 years
Average pump life (for single-shift operation) is at least 0.5 years
Power consumption:
in stationary mode is no more than 250 VA
maximum (at startup) is no more than 280 VA
Overall dimensions of the generator, (width x depth x height) are not more than 230x470x450 mm
The mass of the generator is not more than 18 kg
Operating conditions:
ambient temperature, °C, from +10 to +35
powered by single-phase AC voltage, V, 220 (+10 -15)%
and frequency, Hz, 50 +1
The generator for electrical safety meets the requirements of Class 1, type H according to GOST 12.2.025-76
NPP Himelektronika
Moscow
Produced in: Moscow
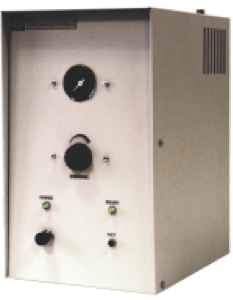
Air Purification Units BOV-1
from
79 200 ₽
They are designed for purification of nitrogen (BOV-1A) and air (BOV-1) from hydrocarbons
Technical specifications
Inlet air pressure is not more than 825 ± 5% kPa (8 ati)
Output pressure control limits is from 0 to 413 kPa (from 0 to 4.0 ati)
Minimum required excess of inlet pressure over outlet pressure is not less than 103 kPa(1 ati)
Maximum permissible air flow is not more than 1.0 l/min
Concentration of hydrocarbons at maximum flow rate in the outlet air is no more than 0.1 ppm
Water vapor concentration at 20°C and 100 kPa is no more than 10 ppm
Instability of the output pressure when the flow rate changes from 0 to the maximum value is not worse than ± 7 kPa
Instability of the output pressure when the input pressure changes by ± 100 kPa is not worse than ± 7
Ready time after switching on at a flow rate not exceeding the maximum value is no more than 30 min
Power consumption is not more than 50 VA
Overall dimensions, (width x depth x height) are no more than 185x310x310 mm
Weight is not more than 5.0 kg
Working conditions:
ambient temperature, °C, from +10 to +35
relative humidity of the ambient air, %, no more, at 35 ° C 80
electric power from a single-phase AC network
with a voltage of 220 +10% -15%
and a frequency of 50 ± 1 Hz
NPP Himelektronika
Moscow
Produced in: Moscow
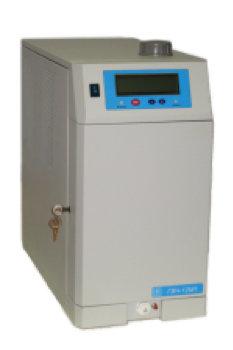
Pure Hydrogen Generator GVCH-6M
from
153 600 ₽
The characteristics of the device are similar to the GVCH-12D model; the difference is in the absence of a reactor to remove traces of oxygen and the capacity, respectively, is 6 liters/hour (100 ml/min). Optionally equipped with a reactor for using hydrogen as a carrier gas.
Technical specifications
Purity of hydrogen in terms of dry gas is about 99.995%
Concentration of water vapor at 20 °C and 1 atm is no more than 5 ppm
In the output pressure stabilization mode
The range of the specified output pressure of hydrogen is from 1.5 to 6.1 ati
Stability of the output pressure of hydrogen is not worse than ± 0.02 ati
Maximum hydrogen capacity reduced to normal conditions is 6 l/h
The time of setting the operating mode, with the output turned off is no more than 20 minutes
In the performance stabilization mode:
The range of the specified hydrogen performance is from 0 to 6 l/h
Maximum developed pressure in performance mode is 5.0 ati
Volume of distilled water to be poured is 1.0 l
Distilled water consumption is no more 0.01 l/hour
Water consumption is 1.6 g/l of hydrogen
The average life of a replaceable deionization filter cartridge (at maximum performance and single-shift operation) is at least 1 year
Average power consumption:
in stationary mode is no more than 80 VA
maximum (at startup) is no more than 100 VA
Overall dimensions of the generator, (width x depth x height) are not more than 230x470x450 mm
The mass of the generator is not more than 15 kg
Operating conditions:
ambient temperature, °C, from +10 to +35
powered by single-phase AC voltage, V, 220 (+10 -15)%
and frequency, Hz 50 ± 1
The generator for electrical safety meets the requirements of Class 1, type H according to GOST 12.2.025-76
NPP Himelektronika
Moscow
Produced in: Moscow
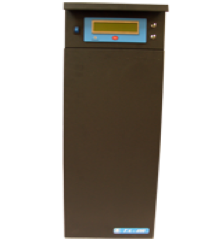
Nitrogen generator GA-400
from
408 000 ₽
Nitrogen generators are designed to create an inert atmosphere, fill low-pressure tanks and other applications that require a large, by laboratory standards, nitrogen consumption with reduced requirements for its purity.
The warranty period of operation of the generator is 12 months from the date of sale by the manufacturer.
Technical specifications
Volume fraction of nitrogen is not less than % by volume (including impurities of inert gases — argon, neon, helium) 99.5
Volume fraction of oxygen is not more than 0.5 % vol.
Volume fraction of water vapor is not more than, % vol. 0.002 (20 ppm)
Maximum nitrogen capacity is at least 400 l/h (6.66 l/min)
The time of setting the operating mode for single-shift operation is no more than, min, 30
Nominal inlet air pressure is 6 ati
Maximum allowable inlet air pressure is 8 ati
Minimum inlet air pressure is 5.5 ati
Compressed air consumption, at nominal inlet pressure and maximum flow rate is no more than 3000 l/h (50 l/min)
Power consumption is not more than 100 VA
Overall dimensions, (width x depth x height) are not more than 230x580x680 mm;
Weight is not more than 30 kg
Working conditions:
ambient temperature, C°, from +10 to +35
Electric power supply from
single-phase AC mains voltage, V, 220± 10%
and frequency, Hz, 50 ± 1
Average full service life is at least 6 years
The generator for electrical safety meets the requirements of Class 1, type H according to GOST 12.2.025-76
NPP Himelektronika
Moscow
Produced in: Moscow

Pure nitrogen generator GCHA-18-K
from
396 000 ₽
The characteristics of the device are similar to the GCHA-18 model;
the difference is that the oil–free compressor built into the GCHA-18-K generator provides complete autonomy of the device.
The warranty for the device is 18 months, for the built-in compressor-12 months from the date of sale.
NPP Himelektronika
Moscow
Produced in: Moscow
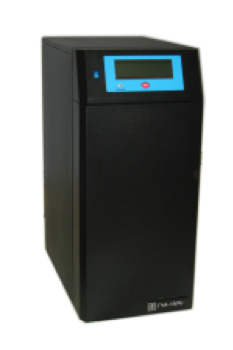
Pure nitrogen generator GCHA-21
from
264 000 ₽
Designed for laboratory production of nitrogen of the highest purity that are used to power analytical instruments (chromatographs, express analyzers of hydrogen content in metals, organic carbon concentration meters, sample evaporators, etc.), boxes with an inert atmosphere.
NPP Himelektronika
Moscow
Produced in: Moscow

Nitrogen generator GA-200-N
from
320 400 ₽
The GA-200-N nitrogen generator (hereinafter referred to as the generator) is a modification of the GA-200 nitrogen generator and is designed primarily to work with a storage tank (receiver) in which a certain "reserve" of nitrogen can be created. Unlike the GA-200, the GA-200-H generator has a built-in pressure monitoring system for nitrogen accumulated in the receiver, which puts the generator into "standby" mode when the maximum pressure value is reached in the receiver, and restarts the generator when the pressure drops below the minimum value. This work allows you to reduce energy consumption and increase the service life of the compressor feeding the generator.
Technical specifications
Volume fraction of nitrogen is not less than, % by volume (including impurities of inert gases — argon, neon, helium) 99.4
Volume fraction of oxygen is not more than, % vol. 0.6
Volume fraction of water vapor is not more than, % vol. 0.002 (20 ppm)
Maximum nitrogen capacity, with nitrogen pressure in the storage tank below 2 ati is at least 200 l/hour (3.33 l/min)
Nominal inlet air pressure is 6 ati
Maximum allowable inlet air pressure is 8 ati
Minimum inlet air pressure is 5.5 ati
Compressed air consumption, at nominal inlet pressure and maximum flow rate is no more than 1800 l/hour(30 l/min)
Factory setting of the maximum pressure in the storage tank is 3.5± 0.2 ati
Factory setting of the minimum pressure value in the storage tank is 2.4 ±0.4 ati
Power consumption is not more than, VA, 100
Overall dimensions (width x depth x height) are not more than, mm, 230x525x510;
Weight is not more than 27 kg. Working conditions:
ambient temperature, C°, from +10 to +35
Electric power supply from
single-phase AC mains voltage, V, 220± 10%
and frequency, Hz, 50 ± 1
Average full service life is at least 6 years
The generator for electrical safety meets the requirements of Class 1, type H according to GOST 12.2.025-76
NPP Himelektronika
Moscow
Produced in: Moscow
