Search

135 products
View:
  • Selected: 1
    Applying
    Loading...
  • Selected: 0
    Names
    Loading...
  • Selected: 0
    Manufacturer
    Loading...
  • Selected: 0
    Made in
  • Selected: 0
    Additional
    Loading...
All filters
  • Applying
    Loading...
  • 122
    Names
    Loading...
  • 27
    Manufacturer
    Loading...
  • 16
    Made in
  • 43
    Additional
    Loading...
View:
135 products
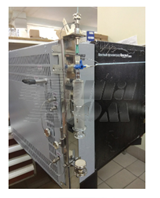
Device for automatic isolation of nucleic acids COLIBRI
from 2 840 000 ₽
1 supp.
The open system allows you to work with reagents and laboratory plastics from various manufacturers Russian-language software Modifications: - COLIBRI 24 - the ability to select from 1 to 24 samples - COLIBRI 48 - the ability to select from 1 to 48 samples - COLIBRI 96 - the ability to select from 1 to 96 samples Range of working volumes: - COLIBRI 24 - 200 – 5000 mkl - COLIBRI 48 - 30 – 1000 mkl - COLIBRI 96 - 20 – 1000 mkl A unique format of consumable plastic - 8-hole strips and combs Two built-in thermostats The accuracy of temperature maintenance is ± 1 °C Heating/cooling - up to 100 °C / up to 35 °C Universal Thermostat Tube Unit Built-in computer Ready-made allocation protocols The time of one extraction cycle is from 11 minutes Built-in bactericidal UV lamp for interior treatment
SYNTOL
Москва
Produced in: Moscow
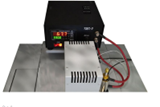
VD-20NF Eddy Current Flaw Detector
The principle of operation of the VD-20NF eddy current flaw detector The principle of operation of the VD-20NF flaw detector is based on the generation of eddy currents on the surface of the controlled part and subsequent analysis of the signal at the output of the converter, which correlates with the characteristics of the active secondary field. The device consists of two main blocks: electronic one and electromechanical one, in which an eddy current converter of transformer type is installed. The controlled products (bearing rollers) enter through the input tray into the electromechanical unit of the flaw detector, where they move sequentially and fall under the pressure rollers of the overhead converter holder. The clamping mechanism is adjusted to each size of the rollers, so as to ensure tight contact with the curved surface and fix the tip of the transducer at the required distance from it. The detection of defects occurs due to the imbalance of the converter when it is located above the surface of the controlled product, caused by the interaction of the primary electromagnetic field generated by the converter with the secondary electromagnetic field of eddy currents induced in the controlled product by the primary field. When cracks are detected, the electronic unit of the flaw detector gives sound and light warning signals, and also triggers the electromagnet of the sorter, which directs the controlled roller into the tray for defective products. In the absence of defects, the controlled roller is directed towards the output tray of the flaw detector. Design features and advantages The VD-20NF eddy current flaw detector is equipped with removable input and output trays, power-on switches and a drive for feeding controlled products to the converter, as well as handrails for convenient transportation of the unit. The mechanisms of the electromechanical unit are protected by a frame made of steel plates. The electronic unit of the flaw detector is portable and can be installed both on the top panel of the electromechanical unit and on the surface of the desktop. Controls and indications of defect detection are located on the front panel of the electronic unit. The delivery package also includes a power adapter for the electronic unit and a tuning sample. The advantages of the VD-20NF flaw detector include: high reliability (the service life of the flaw detector is more than 10 years); it is easy to set up and operate; it has several types of defect detection alarms; the high probability of detecting defective products (at least 99.9%); low number of false positives (less than 5%). Scope of application According to the current standards of safety and product quality control during repair work in locomotive depots and repair plants, bearing rollers that have passed visual inspection and are recognized as suitable for further operation according to the criteria of geometry and condition of the working surface are subject to mandatory additional control using eddy current flaw detection to detect fatigue cracks invisible during visual inspection on the rolling surface of the rollers. The VD-20NF eddy current flaw detector allows for quality control and automatic disassembly of bearing rollers of various shapes and sizes both in laboratory and factory conditions in full compliance with the requirements of the regulatory documents of Rosstandart and the methods of performing control measurements used in JSC "Russian Railways".
Produced in: Moscow
Overhead mixer TM 100 Primelab
from 125 000 ₽
The latest development, the Primelab high-power top-drive mixer, has virtually no analogues even among models from the world's leading manufacturers. It helps solve a wide range of problems related to mixing dense, viscous samples, reagents, and materials. With its help, you can achieve rapid homogenization of the mixture. A significant plus: the graphic display is large and easy to read. With it, the employee working with the mixer will not get tired eyes, even if the mixing work needs to be carried out for several hours in a row. The steel case with durable plastic inserts is resistant to damage, which provides good protection for the device mechanism. The model is easy to operate. It works quite quietly and does not produce a lot of splashes. Main applications of the mixer: • light industry; • petrochemistry; • pharmaceuticals; • medicine; • physical and chemical analysis. Features and Benefits • Thanks to the ergonomic design of the stirrer body, it can be used not only in stationary laboratories, but also in mobile mobile stations. • The submersible type device is used to implement a wide range of laboratory work. • Starting and stopping the mixer is carried out using just one button located on the front panel. • Smooth power control handle. • The noise level remains no more than 50 dB, which creates comfortable working conditions for employees with this equipment. • An overheating system is provided, which is ensured by design features. Characteristics • Country Russia • Display type: LCD • Stirrer shaft diameter max.: 10 mm • Motor type: Brushless • Voltage: 220/50 V • Protection class acc. with DIN EN60529: IP42 • Sample volume (water): 50 liters • Timer: yes (digital) • Device weight: 2.8 kg • Dimensions, WxHxD: 72x260x197 (without rod) • Power consumption, W: 105 • Grounding: Yes • Overheat protection (shutdown): Yes • Maximum torque: 1.3 Nm (at 360 rpm) • Rated torque: 0.4 Nm (at 2200 rpm) • Rotation speed: 20-3000 rpm • Speed adjustment: Encoder (Valcoder) • Accuracy of maintaining the set speed: 5% • Limit state signaling: Optical and acoustic • Display color: Color • Resolution of rotation speed setting: 1 rpm • Chuck type: Three-jaw with manual locking • Parameter display: Optical • Resolution of rotation speed display: 1 rpm • Display size (diagonal, inches): 2.4 Contents: The device delivery set includes: 1) device – 1 pc.; 2) power supply – 1 pc.; 3) power cable – 1 pc.; 4) instruction manual combined with a passport – 1 pc.; 5) bracket Ø13 mm. for attaching the device to a tripod – 1 pc.; 6) hex key 2 mm. - 1 PC.
Primelab
Mytishchi
Produced in: Mytishchi, Moscow region
MX-10 Magnetometer
MX-10 Magnetometer
from 67 000 ₽
The MX-10 magnetometer is an auxiliary tool for conducting magnetic powder control using permanent magnets, rectified current electromagnets by the applied field method, as well as for monitoring by the residual magnetization method according to the requirements of the current regulatory documentation. The MX-10 magnetometer meets the requirements in the field of non-destructive testing for the main industries: nuclear, energy, oil and gas complex, general and special engineering, railway transport, aerospace industry, elevator and crane facilities, etc. Magnetometer MX-10 is an electronic measuring unit with a remote measuring converter, which is based on the Hall effect. The design of the device allows measuring both the normal and tangential component of the magnetic induction vector directly on the surface of the part. The measured value of the magnetic field induction value is displayed on the digital indicator of the electronic unit. Features and Benefits The updated version of the MX-10 magnetometer has a modern element base, which has significantly improved its performance, reduced error and expanded the measurement range (see the Table of Technical characteristics). The device is capable of operating in two modes: Constant measurement mode. This is convenient when carrying out a large number of measurements over a short period of time. Automatic shutdown mode 1 minute after measurement. It allows you to save the charge of the device, which is especially important in the field. A thermal compensation circuit ensures stable measurement readings at any temperature change. Other features include: The small dimensions of the Hall measuring transducer for the MX-10 magnetometer make it possible to measure the induction of the magnetic field in grooves, grooves, angular transitions, i.e. in those areas of the controlled product that are stress concentrators and are most dangerous from the point of view of cracking; A wide range of measurements of the magnitude of the magnetic field induction; The smallest measurement error among analogues in the entire operating temperature range; Convenience of measurement by a remote measuring transducer in various planes; Low power consumption and, as a result, long working time; Low cost compared to similar models on the market; Compact dimensions; Manufacturer's warranty – 12 months; The device is included in the state register of measuring instrument RU.C.27.004.A No. 36079 dated 01.09.2009 and has undergone a verification procedure. Magnetometer MX-10 (milliteslameter) it is also included in the register of measuring instruments, test equipment and measurement methods used in JSC "Russian Railways". Scope of application 1. Verification of the magnetization modes of controlled parts using permanent magnets, rectified current electromagnets by the applied field method, as well as during the control by the residual magnetization method, by measuring the tangential and normal components of the magnetic field strength vector at one or more points on the surface of these parts. The number of points at which the magnetic field strength is measured and their location on the controlled surface depend on the shape of the part, as well as on the type and design of the magnetizing device used. 2. Control of the magnetization of parts before welding. During electric arc welding of non-magnetized parts, the effect of "magnetic blowing" is observed, i.e. the deviation of the electric arc from the axis of the electrode, the wandering of the arc end along the product, which leads to metal splashing during welding, deterioration of the seam quality. Therefore, before welding, it is necessary to measure the level and direction of magnetization of the parts and demagnetize them if necessary. 3. Verification of the residual magnetization after magnetic powder inspection. Demagnetization and verification of the residual magnetization of responsible, rubbing parts, as well as parts in contact with them after assembly, is prescribed in the requirements of the IPC and is a technological stage of control. 4. Magnetization control before assembling various structures. Magnetized parts can affect the operation of automation devices, cause errors in the readings of instruments, equipment. Magnetization can cause the accumulation of wear products in the movable joints, cause a negative effect on subsequent technological operations. Due to possible undesirable consequences, the parts are demagnetized and the quality of their demagnetization is checked. 5. Control of gas and water meters. Housing and utilities enterprises may also be interested in the device. It is known that existing gas or water flow meters can be easily "deceived" with the help of strong permanent magnets that reduce the rotation speed of the flow sensors. There are different ways to detect such theft. One of them is the control of the residual magnetization of the counters using magnetometers. The measured value should not significantly exceed the Earth's magnetic field, otherwise it can be concluded that there was unauthorized interference with the operation of the device. Main technical characteristics Measuring range, MT from 0.1 to 100 The limits of the permissible basic absolute measurement error, MT D = 0.02 VI + 0.05, where VI is the magnetometer readings in MT Power supply battery type: PP3 (nine-volt battery) Consumption current, mA, no more than 15 Duration of continuous operation (from fully charged batteries), h, at least 20 Overall dimensions, mm: – electronic unit (LxWxH) 120x60x25 – Measuring transducer (Diameter x Length) 18x173 Weight, g, not more than 160 Ambient operating temperature, °C -10...+40
Produced in: Moscow
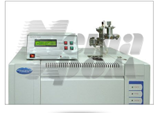
MAESTRO-αMS gas chromatograph by Interlab
We offer expert laboratories of physicochemical methods of analysis a gas chromatograph with a quadrupole mass spectrometric detector «MAESTRO-αMS». Quadrupole GC-MS «MAESTRO-αMS» is in demand for targeted research (screening) and non-targeted search. In targeted studies, it is necessary to detect given target compounds in samples of various nature and origin at the level of residual amounts, for example, several picograms of the target compound in the injected 1 μl of liquid sample. Most often, targeted research is carried out in the following areas of laboratory screening: ecology, food safety, clinical monitoring, narcology, doping control, production control of various raw materials. In targeted studies, it is often required not only to confirm the presence of a compound in a sample, but also to determine the level of its content quantitatively, since both the list of target compounds and the permissible level of their presence in the sample are specified by regulatory documents. Quantitative analysis requires standards for the substances you are looking for. When conducting a non-target search, as a rule, it is required to analyze a sample of unknown composition, in other words, to find as many compounds as possible in the sample and identify (identify) each of them. Since the identification of a detected compound is carried out by comparing its experimental mass spectrum with the spectrum of a pure substance obtained under standard conditions, this task requires reference libraries of mass spectra of pure substances, as well as tools for working with mass spectra, for example: algorithms for cleaning experimental mass spectra from background and spectral noise (mass spectrum deconvolution algorithms), library search and comparison algorithms. An off-target search is called a qualitative analysis, since the researcher is primarily interested in the list of detected substances, and not in the quantitative assessment of their content in the sample. When creating MAESTRO-αMS, we took into account our own many years of experience in operating imported analogues. We have made the device inexpensive. We have made the device compact: The modern design of the device made it possible to make the MAESTRO-αMS really compact, so that the device occupies the smallest possible area on the laboratory table. The layout of the device allows you to remove the ion source on the front flange for cleaning and replacing the cathodes, if necessary. We have reduced the cost of operation: When developing the MAESTRO-αMS, we sought to increase the resistance of the device to sample matrices and use a minimum of consumable materials in order to eliminate downtime for maintenance and replacement. As a result, we have created an extremely stable ion source and a perpetual photomultiplier detector. We have created special software: Even at the first acquaintance with the software, it becomes obvious that being in the window of each button and each parameter to be changed is expedient and logical. Our software product was created for the convenience of the operator, so we implemented the necessary and eliminated the unnecessary. We used the principle of one active window, in which the operator moves sequentially step by step, performing hardware settings, setting the data collection method, subsequent processing algorithms, templates for presenting the results. MAESTRO-αMS offers a wide range of scanning modes, built-in algorithms for working with mass spectral data, convenient unloading of initial data arrays for their processing in specialized software packages, graphics export for presentations and scientific publications. You can use several libraries of mass spectra at the same time, or create your own for your typical tasks. Finally, we provide a 5-day training course for professionals who want to understand the theoretical foundations of the method and their implementation in the hardware of modern quadrupole GC/MS. The volume and depth of presentation of the material from the developers of the device is intended to lay the foundation for the effective use of «MAESTRO-αMS» in the future. Some technical characteristics of MAESTRO-αMS: • Instrumental detection limit (SIM, OFN @272 m/z ) < 10 fg; • Scan modes: scan for selected ions, full scan in a given mass range, combined scan mode; • The number of simultaneously connected libraries of mass spectra is at least 10.
Produced in: Moscow
MS-10 Magnetic Structuroscope
from 270 000 ₽
Distinctive features: - Non-destructive testing of strength, plasticity and viscosity of parts and structures made of ferromagnetic steels and cast iron according to the following standards: GOST 30415-96, OST 14-1-184-65, TU-14-1016-74 - Non-destructive testing of the depth and hardness of surface-hardened layers on steel and cast iron parts; - Quality control of low-temperature tempering of cutting and measuring tools, bearing steels; - Control of uniaxial elastic stresses; - Control of the uniformity of the properties of massive parts. Technical specifications: The range of coercive force of the material of the controlled products, A/cm, is 1.0...60. The limit of the permissible basic absolute error of measurements of the coercive force (Ns) on standard samples at a normal ambient temperature of 20 ± 5°C does not exceed the values of 0.1+0.04 Ns (Ns stands for the measured value of the coercive force of the standard sample). This error probability is provided with a gap between the converter and the surface of the controlled product not exceeding 0.5 mm. Basic version: The structroscope is powered by a battery. Extended version: It is possible to work on 220V/50Hz grid. The time of setting the operating mode after power on, min: no more than 2 Time of one measurement, sec: no more than 6 Continuous operation time (without recharging), h: at least 16 Internal memory: up to 512 series of 512 measurements each with the possibility to view the results Operating temperature range: -20°C to +40°C; Overall dimensions, (length x width x thickness), mm: electronic unit: 190x140x80 converter: 135x75x100 Weight, kg: the electronic unit with a battery: 2.3 ± 0.05 the converter: 1.3± 0.05 Basic version kit: Ia5.173.023 Electronic unit: 1 pc. Ia5.125.061 Converter: 1 pc. Ia8.896.121 Control sample of coercive force (plate PN-1): 1 pc. Ia8.896.122 Control sample of coercive force (plate PN-2): 1 pc. Bag-case: 1 pc. Charger: 1 pc. Ia2.778.042 RE Operating Manual: 1 copy. Ia2.778.042 FO Form: 1 copy. Ia2.778.042 MP Verification instructions: 1 copy. Extended version: Additionally, it can be equipped with a Bluetooth® module for communication with a PC and software for receiving and processing data. It can also be equipped with a small-sized converter.
Produced in: Moscow
VD-90NP Eddy current flaw detector in the basic configuration
from 295 000 ₽
The principle of operation of the device: The principle of operation of the flaw detector is based on the excitation of eddy currents in the controlled product and the subsequent release of a signal at the output of the converter, the amplitude and phase of which are determined by the secondary field of eddy currents. Design features and advantages of the VD-90NP flaw detector. The device has a small-sized case, which ensures its lightness, ergonomics and allows you to mount it on your belt or on your arm. The measurement is performed using a remote converter connected by a flexible cable. There are several types of converters for eddy current flaw detection of products made of different materials and different geometries. The large and bright display displays the selected operating modes and measurement results in text and graphic form. The VD-90NP is also characterized by: high sensitivity (it detects cracks starting from 0.1 mm in size); dust–and-moisture-proof housing, which makes it applicable for work in the field; large operating frequency range; maximum working clearance up to 10mm; Bluetooth connection; the ability to control products with high surface roughness, up to Rz320 class; light and sound indication of defect detection; wide operating temperature range from –30°C to +50°C; autonomous low-voltage power supply; long continuous operation time from one set of batteries; compliance with the standard GOST R ISO 15549-2009 (ISO 15549:2008). The use of a microprocessor-based hardware and software platform provide it with the following operational characteristics: automatic adjustment when measuring conditions change, including compensating the influence of the gap; built-in calibration modes; saving the measurement results in the internal memory of the device; a large number of stored programs: sets of parameters and measurement modes, both preset and saved by the user so as to repeatedly monitor the same type of products; The Bluetooth 2.0 wireless communication module allows the device to be used in conjunction with an external laptop or mobile device for remote control, transmission of measurement results for further storage, printing, documentation and analysis. Scope of application: The eddy current method is suitable for non-destructive testing and detection of microcracks in products and parts made of any metals and alloys of complex shape, with high surface roughness, through non-conductive coatings, as well as for checking welded joints. The flaw detector can be used to control parts and assemblies of aviation equipment. The VD-90NP eddy current flaw detector is used for quality control and preventive examination of: - components and parts of rolling stock at railway transport enterprises: wheel sets, auto coupler housings, side frames, spring beams, labyrinth rings, pulleys; - pipes, profiles, rods at rolling mills at the output control, and at the input control of consumers of products; - products made of aluminum and titanium alloys with multilayer coatings at enterprises of the aviation and aerospace industry; - cables, beams, critical components of equipment (cranes, lifts) in construction; - main pipelines in order to detect stress corrosion. A wide range of operating temperatures, dust and moisture protection (IP54 degree of protection), autonomous low-voltage power supply, a long time of continuous operation of the device allows it to be used in the field at low temperatures and under precipitation (rain, snow). Basic kit: • 1 electronic unit for the VD-90NP eddy current flaw detector; • 1 Ia5.125.052 (Type-2) eddy current converter; • 1 converter cable; • 1 charger with batteries; • 1 hand strap; • 1 Ia8.896.104 sample with artificial defects; • 1 Ia8.896.035 coating sample; • 1 storage and carrying case; • 1 documentation set.
Produced in: Moscow
Acoustic ultrasonic flow meter Volga ML
from 400 000 ₽
The flow meter is fully developed by Russian specialists in the field of acoustics, hydraulics and electronics, and is designed to measure the volumetric flow rate and volume of water in pipelines, mainly medium and large, under pressure, non-pressure and combined (pressure-free) flow modes. The flowmeter is based on ultrasonic "time-pulse" multipath technology for measuring the flow velocity in the measuring range. In addition, depth sensors (primary transducers) - hydrostatic, radar contactless, ultrasonic underwater or ultrasonic contactless - are used to measure the flow in water ducts with a combined or non-pressure flow mode. In the presence of deposits affecting the shape and area of the live section of the flow, sediment level sensors are used. Secondary converter It is available in both stationary (~220 V) and portable versions with autonomous power supply. Primary converters Inset and overhead primary converters from the inside allow you to place the measurement gate on any water pipe made of any material, taking into account design features. Pipe sizes Du, mm: 200, 250, 300, 350, 400, 500, 600, 700, 800, 900, 1000, 1200, 1400, 1600, up to 15000 mm The Volga ML acoustic ultrasonic flowmeter is registered as a type of measuring instrument in the Federal Information Fund for Ensuring the Uniformity of Measurements for No. 78414-20 (MP 2550-0361-2019). The Volga ML acoustic ultrasonic flow meter has been recognized as the winner in the nomination Best Technology of the International Environmental Award EWA Award 2020.
Produced in: Moscow